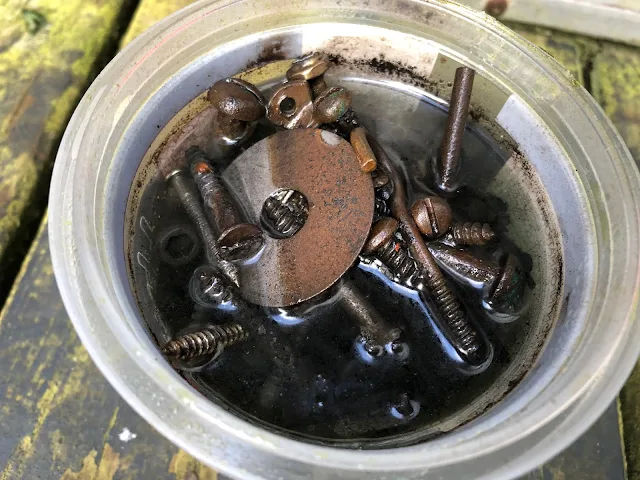
Then there is the piece that defeats all of them. The bench vise too big for any soak container you own. The cast iron skillet with fifty years of crust. The axe head your grandfather owned, where the idea of dunking it in acid feels like vandalism. That is when you build an electrolysis tank, and the internet talks about this method like it is black magic performed by bearded men in barns.
It is not. It is a high-school chemistry cell running in a plastic tub, and it has one property no acid can match: it does not attack sound steel. The current only works on the rust. Leave a part in a vinegar bath for a week and you get etching. Leave a part in an electrolysis tank for a week and you get a clean part.
Best practical rule:
Reach for electrolysis when the part is too big to soak affordably, too rusted for gentle chemistry, or too precious to risk in acid. For a jar of rusty screws, it is overkill — a citric bath is faster to set up.
🔬The Science: What Is Actually Happening in the Bucket
An electrolysis tank is a simple electrical circuit with your rusty part as one terminal. A low-voltage DC current flows from a sacrificial steel electrode (the anode, positive) through a water-and-washing-soda solution (the electrolyte) into your rusty part (the cathode, negative).
At the surface of your part, that current drives a reduction reaction. Red rust is mostly hydrated iron(III) oxide. Fed a supply of electrons, some of it is converted to magnetite — the stable black iron oxide — and some is reduced further toward iron. The important part is physical: the conversion breaks the rust layer's grip on the steel. What was a hard, bonded crust becomes a loose black sludge you can wipe and brush away.
3Fe₂O₃ + 2e⁻ → 2Fe₃O₄ + O²⁻
In plain English: red rust plus electrons becomes black magnetite, which no longer clings to the metal. Meanwhile, water itself is being split at both electrodes — hydrogen gas bubbles off your part and oxygen bubbles off the anode. Those bubbles do useful mechanical work, physically lifting loosened rust, but they are also the reason for the ventilation rule below.
The washing soda is not doing any cleaning. Sodium carbonate simply makes the water conductive enough to carry the current. It is cheap, mild, and does not produce anything nasty at the electrodes, which is exactly why it is the standard choice.
The honest correction: electrolysis does not "reverse" rust, whatever the forums say. Metal that corroded away is gone. Pits stay pits. What you get back is clean, un-etched steel showing every scar of its history — which, on an old tool, is usually exactly what you want.
🧰The Setup, Step by Step
You need: a plastic tub or bucket (never metal), Arm & Hammer Super Washing Soda or any plain sodium carbonate, a length of rebar or scrap steel for the anode, a manual battery charger capable of 2 to 10 amps, some wire, and a stiff brush for cleanup. All of it is available at Home Depot or Lowe's for less than the price of two jugs of Evapo-Rust.
- Mix the electrolyte. About 1 tablespoon of washing soda per gallon of water. More does not clean faster; it just carries more current.
- Prep the part. Degrease it — denatured alcohol works well — and knock off any loose flakes. Remove wooden handles and anything non-metal; a soak this long ruins timber.
- Hang the anode. Position the rebar along one side of the tub, partly out of the water so you can clip to a dry spot. This piece will be destroyed over time. That is its job.
- Hang the part. Suspend it from a wooden dowel across the tub with wire so it does not touch the anode. Touching = short circuit.
- Connect with the charger OFF. Negative (black) clamp to your part. Positive (red) clamp to the sacrificial anode, above the waterline. Get this backwards and the tank will dutifully dissolve your grandfather's axe head instead of the rebar.
- Power up. Switch the charger on at a low setting. Within a minute you should see a steady stream of fine bubbles rising off the part. That is the tank working.
Worked example — a seized bench vise: too heavy for a jar, too pitted for vinegar. Into a storage tote with 5 gallons of solution, rebar down one side, 6 amps overnight. By morning the water was the color of bad coffee, the vise was coated in black sludge, and ten minutes with a nylon brush under the hose revealed clean gray steel and a screw thread that turned freely for the first time in a decade.
⏱️How Long It Takes and What Done Looks Like
Light rust lifts in 2 to 4 hours. Heavy crust wants overnight, and a truly neglected part can run 24 hours without harm — that forgiveness is the whole appeal. The bubbling slows as the rust converts, and the part comes out wearing a uniform matte black film with loose sludge over it.
| What you see | What it means |
|---|---|
| Steady fine bubbles on the part | The cell is working. Leave it alone. |
| No bubbles at all | Bad connection, dead charger, or a smart charger refusing to start. Check clamps first. |
| Rust-colored foam and murky water | Normal. The tank gets uglier as the part gets cleaner. |
| Uniform black film, sludge wipes off | Done. Rinse, scrub, dry, protect — fast. |
Practical tip: the anode grows a thick crust of transferred gunk that chokes the current. Pull it out mid-job, wire-brush it, and the tank speeds right back up. When the rebar is badly eaten, replace it — it costs a couple of dollars.
🧯Safety Rules You Do Not Skip
- Hydrogen gas is real. The cathode gives off hydrogen the entire time. Run the tank outdoors or in a genuinely ventilated space, and keep sparks, flames, and cigarettes away from the water's surface.
- Connect and disconnect with the charger off. A clamp sparking an inch above a hydrogen-producing bath is how a rust project becomes a story.
- Never use stainless steel as the anode. This is the one rule people break out of convenience, and it matters: the chromium in stainless can end up in the bath as hexavalent chromium compounds, which turns your rust water into hazardous waste. Plain mild steel or rebar only.
- Keep the clamps out of the soup. Copper clamps corrode fast in the electrolyte. Clip to dry metal above the waterline.
- Low voltage, but respect it. A battery charger will not electrocute you through the bath, but treat any electrical device near a tub of water like it deserves your attention. Plug into a GFCI outlet.
- Dispose of it sensibly. With a mild steel anode, the spent solution is washing soda and iron gunk — dilute it and it can go down the drain. Sludge goes in the trash, not the garden bed.
🧨What Electrolysis Will Not Do
- It is line-of-sight. The current works hardest on surfaces that face the anode. The back side of the part cleans slower, and deep interior recesses barely at all. Rotate the part, or surround it with anodes on several sides.
- It only works on iron and steel. Aluminum, brass, and zinc-plated parts do not belong in the tank — the process can strip plating and attack aluminum.
- It will not rebuild metal. A blade rusted to lace comes out as clean lace. If a tool is structurally gone, see the guide to the best ways to remove rust from metal for the honest talk about when restoration is not worth it.
🛡️The 10-Minute Aftercare Window
A part fresh out of the tank is the most rust-ready object in your workshop. The old oxide is gone, every coating is gone, and the surface is chemically hungry. Flash rust can haze over electrolyzed steel in minutes, faster than after any acid bath.
Flash rust fix: rinse hot — hot water helps the part self-dry — scrub off the black sludge, towel it, chase moisture out of threads and seams with a heat gun or compressed air, and get oil, wax, or primer on it immediately. The full routine, coating choices included, is in the guide to how to stop rust coming back after you remove it. On cast iron cookware, the protective coat is a fresh seasoning cycle, done the same day.
🏁Final Verdict: The Patient Heavyweight
Electrolysis is the method you graduate to when soaking stops making sense. It is slower to set up than opening a bottle, and faster to forgive than anything else on the shelf: it cannot over-soak, cannot etch, and costs pennies per job once the tank exists. Match the method to the problem — acids for small and light, electrons for big and stubborn — and remember that with rust, removal is only ever half the job.
This guide pairs with citric acid rust removal for the soak-sized jobs and how to stop rust coming back for the aftercare that makes it stick. For the big picture, start at the best ways to remove rust from metal.


